Damage to the drum is a rarity. It occurs due to prolonged use, bearing wear or factory defects. If this happened to your machine, you need to understand what is best: replace the drum in the washing machine or buy new equipment.
In the article, we will analyze the ways how to replace failed parts on your own, and also consider how much the new ones cost.

When to replace the drum in the washing machine
The decision to replace the drum is made based on such factors:
- The cost of the washing machine that needs to be repaired.
- The cost of acquiring new equipment.
- The cost of spare parts and repairs.
If you have a really expensive model of a washing machine, which you are used to and by no means want to change, then one point in support of replacing the drum. The second point gets a replacement if you are ready to do the work yourself - saving on repairs.
Keep in mind that basically drums are sold complete with a tank. Separately, you are unlikely to be able to purchase the item.

So, compare the cost of new parts with the cost of a washing machine. Add the repair price in the service center. Perhaps it is really more profitable to purchase a new washer?
For clarity, we give examples. How much does a drum in an assembly with a tank cost for various models of washing machines:
- SM Beko, Blomberg - from 3100 rubles.
- SM Indesit - from 5600-5800 rubles.
- SM Ariston - from 10,200 rubles.
- SM Electrolux, AEG, Zanussi - from 13800 rubles.

Add the cost of repairs here. In the service center, the amount will be 4500-5000 rubles. In cheaper workshops or from private masters, you will pay approximately 2500-3000 rubles.
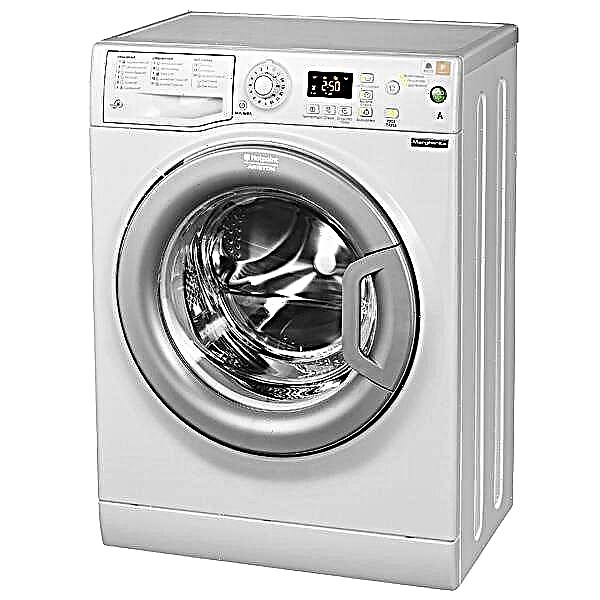
For example, we compare the cost of replacement with the cost of a budget Electrolux car, the price of which will be from 17,990 rubles.
It turns out that changing the drum is really beneficial if you do it yourself. If you decide to carry out the work yourself, then buy the right part for your model and proceed.
Preparing to repair a washing machine
In this case, you will need to disassemble the washing machine, get the tank with the drum and install new elements. It is not necessary to disassemble the tank itself, since prefabricated kits, including a sleeve and bearings, are on sale.
Prepare the tools:
- screwdriver set: slotted, Phillips, hex;
- socket and wrenches;
- nippers;
- pliers;
- WD-40 liquid for attached elements.

Before replacing the drum in the washing machine, you need to disassemble it. For this, the AGR is worth preparing:
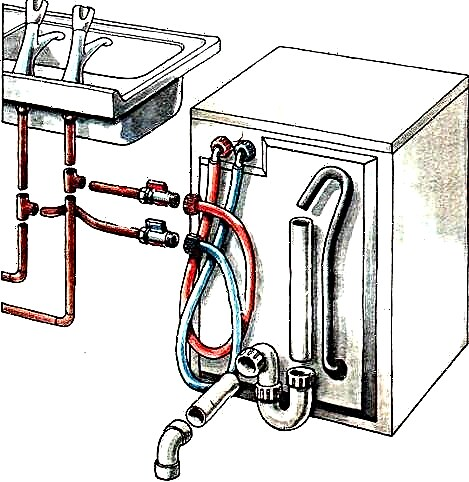
- Unplug the washing machine.
- Disconnect the intake hose, drain water from it.
- Drain the drain filter. It is located in front of the chassis from below.
- Move the machine away from the wall.
Step by step disassembly of the washing machine
Here is an example of disassembling a machine with dismantling the front wall, since this repair is the most difficult.
Start at the top and back.
Using a Phillips or hexagonal screwdriver, unscrew the two self-tapping screws at the back. Slide the cover forward and remove it from the chassis.

Be careful when removing the cover. Its edges may be sharp.
Now unscrew all the screws around the perimeter of the back cover, remove it, set it aside.

Go to the front panel
Pull out the detergent drawer. To do this, press the latch in the center and pull it towards you. Remove the screws located behind the dispenser and on the other side of the control panel. Use a flat-blade screwdriver to release the plastic latches.
Lay the panel on top of the chassis. It is not necessary to unfasten the wires.

Detach the cuff
Open the hatch door. Bending the sealing rubber, pry the clamp and remove it. Insert the cuff inside the drum.

Now unscrew the two screws holding the UBL lock. Disconnect the wires from the lock. It remains to unscrew the screws along the perimeter of the front panel and remove it.
Remove the remaining parts in front.
Remove the front counterweights from the tank. Undo the wiring of the heater. After loosening the drain pipe clamp, disconnect it from the tank. Be careful, water may spill out of it, so prepare a container in advance.

Detach parts at the top
Now you need to empty the top of the tank. First of all, lift up the detergent bin. After loosening the clamps, unfasten the pipe from the tank to the hopper. Pull out the hopper with the inlet valve. To do this, disconnect the wires from the valve, unscrew the mounting screws on the back.

Remove the upper counterweight by unscrewing the bolts. Disconnect the pressure switch hose from the tank.
Go to the back
Remove the drive belt from the pulley. Immediately you can unscrew the pulley so that later it is easier to remove the tank. Lock its ring with a wooden plank or hammer handle. Try unscrewing the central bolt with a wrench. If it does not work, use the WD-40. Remove the tank pulley.

Disconnect the wiring of the electric motor and the heater if it is located in the rear. Unscrew the bolts securing the motor, pull it out of the housing.

Disconnect the wiring around the perimeter of the tank. For plastic snaps that hold the wires, use wire cutters.
You have come to the final stage. It remains to unscrew the shock absorber bolts and remove the tank from the springs. Pull it out of the tank.

Time to learn how to change the drum in the washing machine.
To do this, connect the pulley to the tank, securing it with a bolt. Here you may need the help of another person. Lift the drum tank and place it in the housing through the top, hanging from the hooks.
Reassemble the washer in the reverse order.

Now you know how to perform the replacement, so you can compare the pros and cons of such repairs. Perhaps you will be more profitable to purchase a new car.
And for those who decided to replace, a video on the topic: